
I made another circuit to display TV Video output from the Arduino.
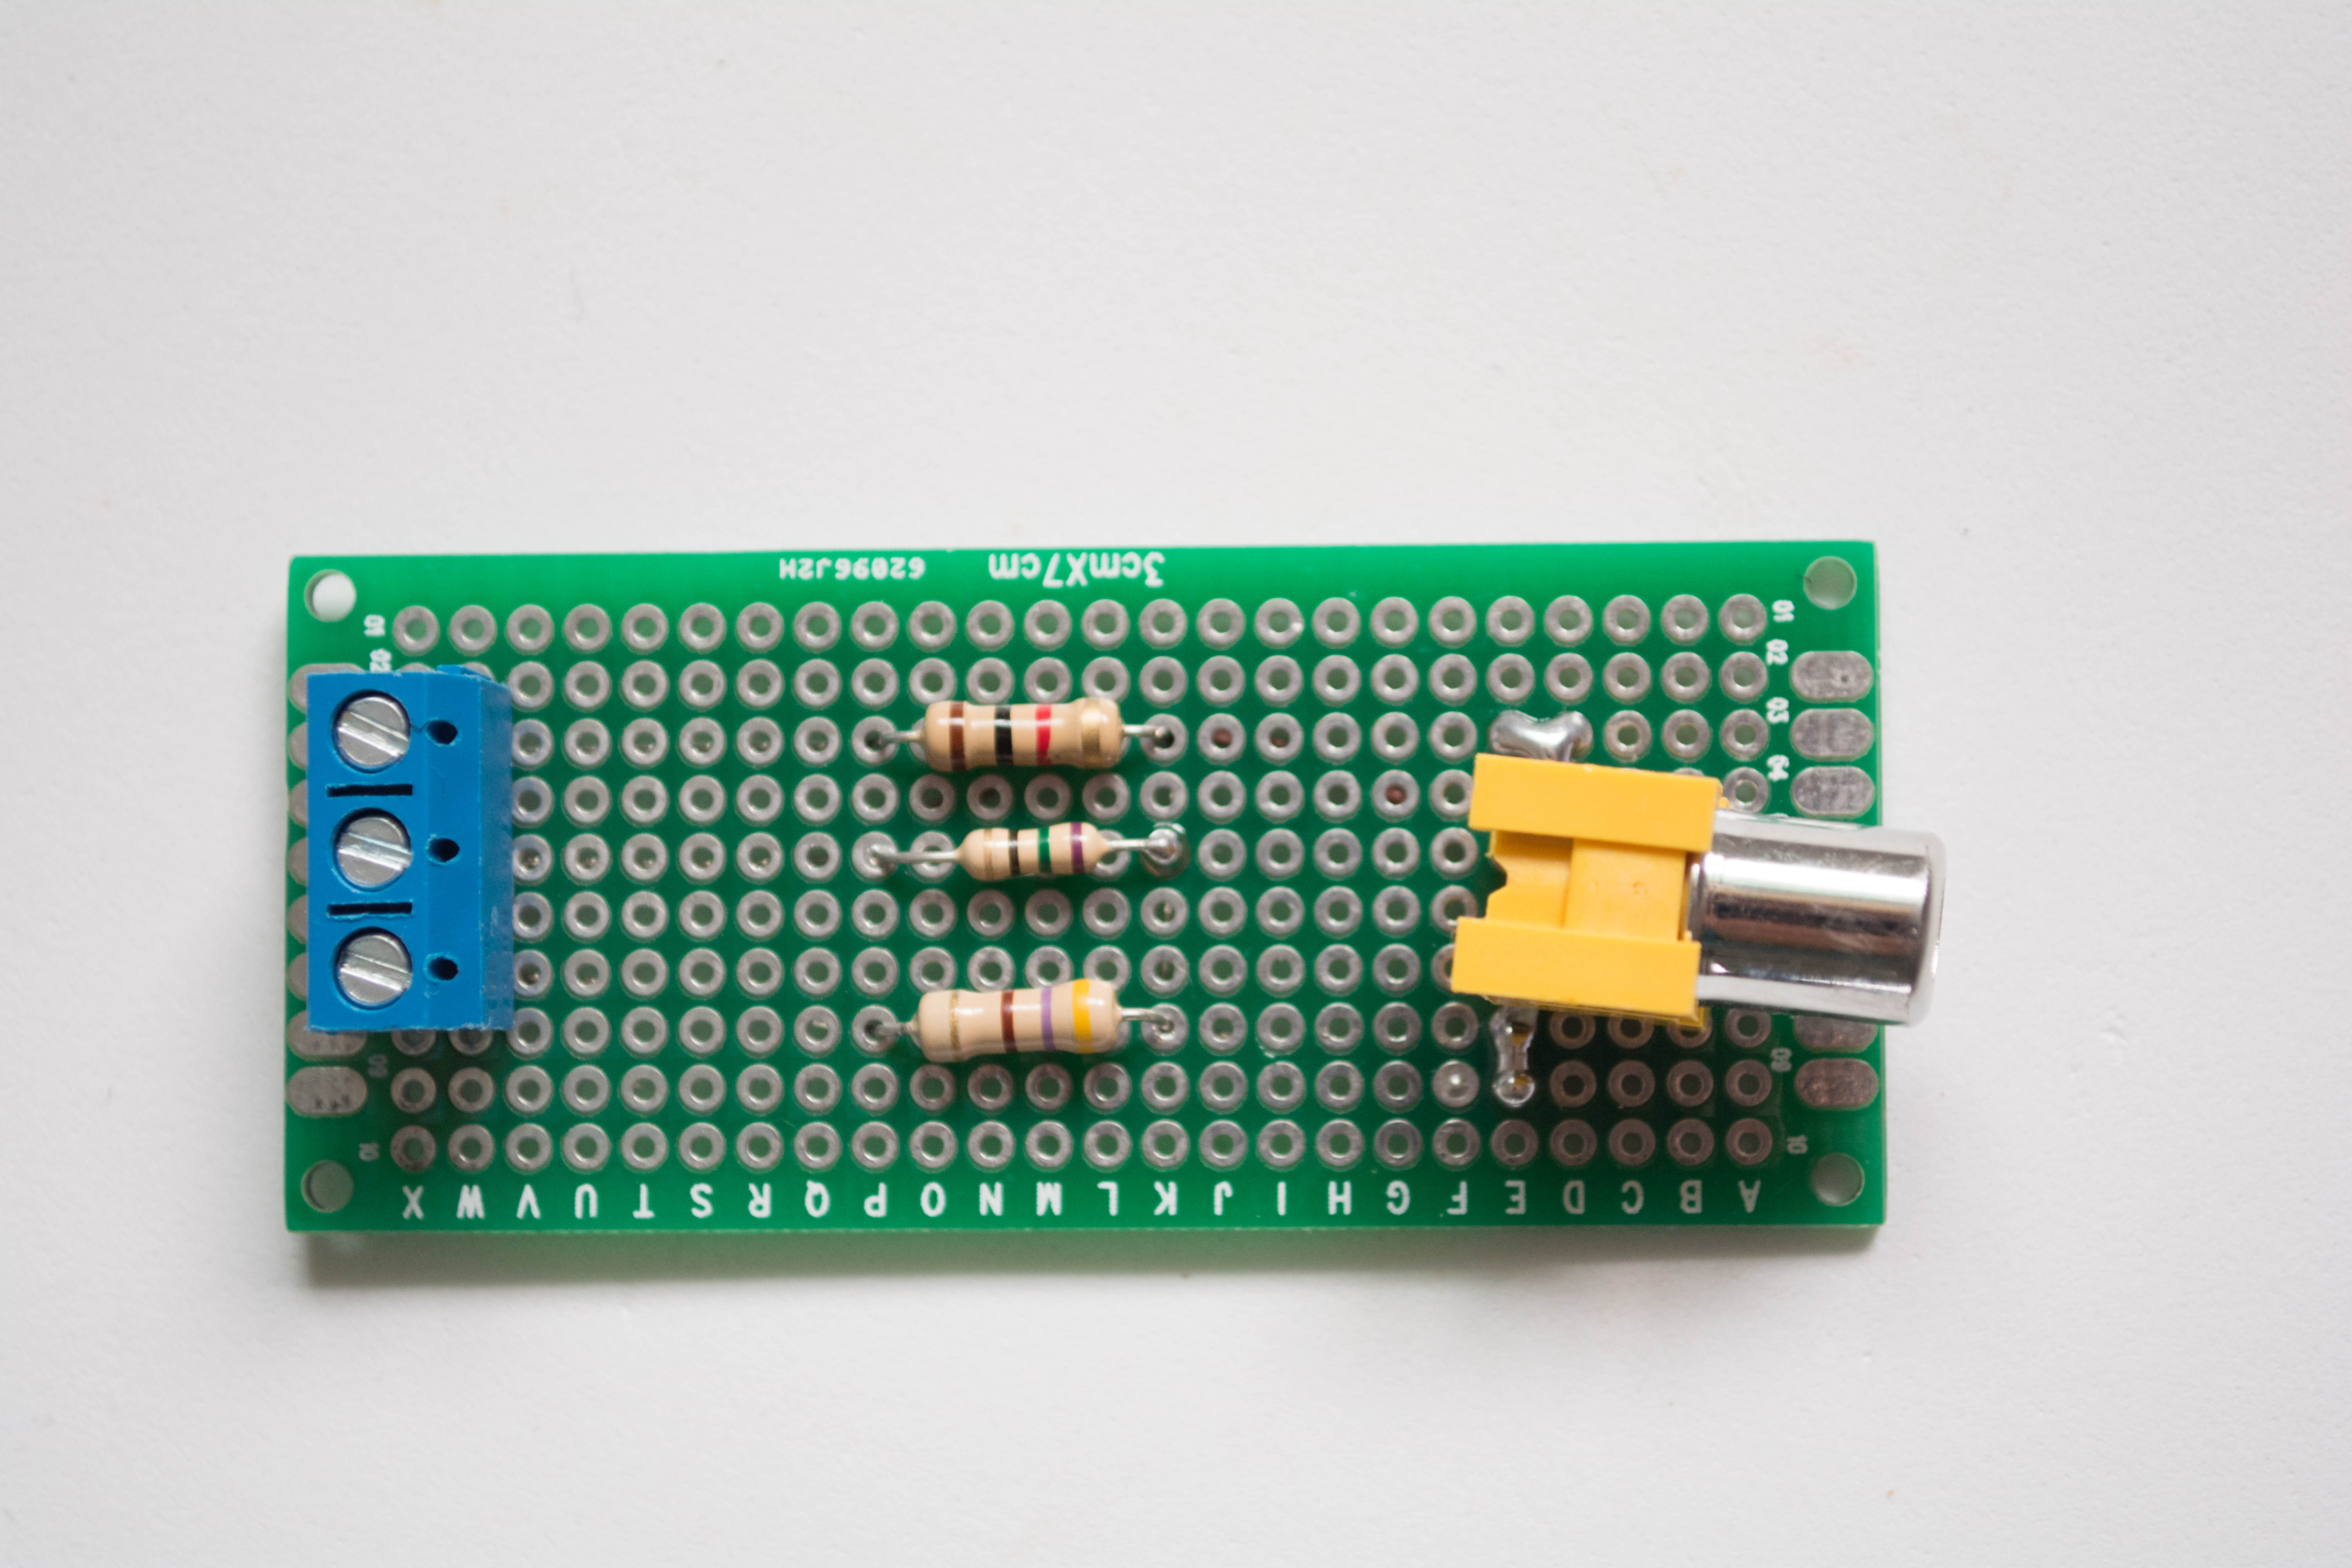
It uses the TVOut library (documented at the TVOut Arduino Playground) which can be used to output an NTSC or PAL video signal. The circuit is actually just a means of adding three resistors to an RCA video cable. Instead of cutting a cable and soldering on the resistors, it is much cleaner to use this circuit. The circuit is very simple, consisting of an RCA jack, three resistors and a three pin PCB connector. Normally, only two resistors are used (a 1K ohm resistor to sync and a 470 ohm to video), however, some TV/video monitors need an additional 75 ohm resistor from video to ground. Therefore, I also added that 75 ohm resistor in my circuit. Here is a picture of the circuit and the Fritzing diagram showing how to hook it up to an Arduino Leonardo:
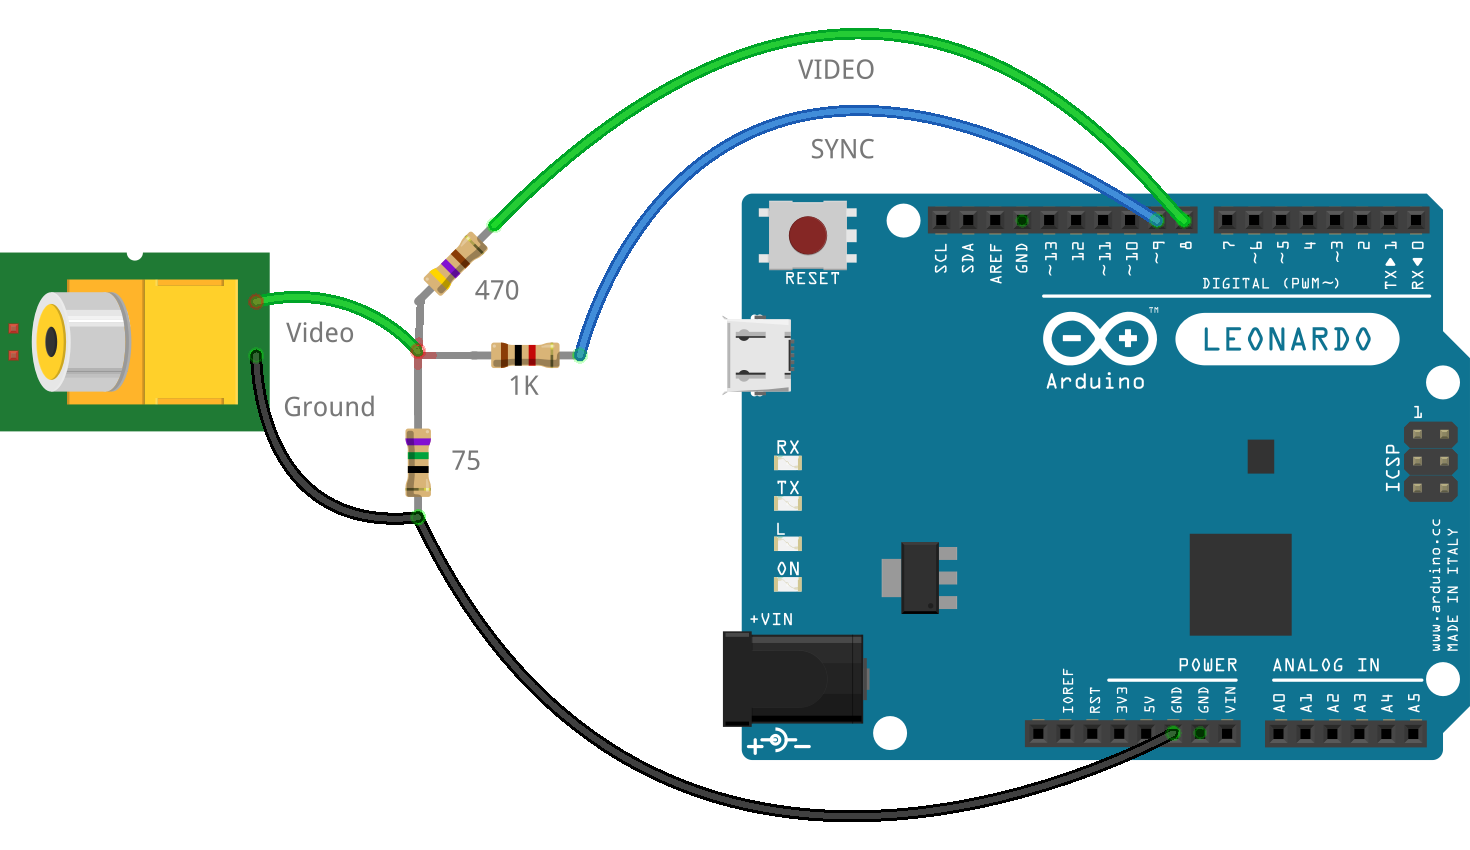
If you want diagrams’ Fritzing source file, download it from here.
I tried the TV Video output from the Arduino at first with my Arduino of choice, a Leonardo, and found that it did not work when the Leonardo is powered from a USB cable attached to a PC. The screen flickered too much. When the Leonardo was powered from a wall plug or battery, it functioned perfectly. I found that other Arduinos (the Uno or Mega) work fine from a PC USB power connection. Depending on which arduino you use, you will need to adjust where the video and sync pins are connected. There is a handy chart on the TVOut Arduino Playground documenting the pins used for various arduinos.
For small projects and portability, an LCD is great to use to display output from an Arduino. However, if your next project needs to display data from an arduino so more people can see it (perhaps a large screen TV), you might consider using the TVOut library and this simple circuit.
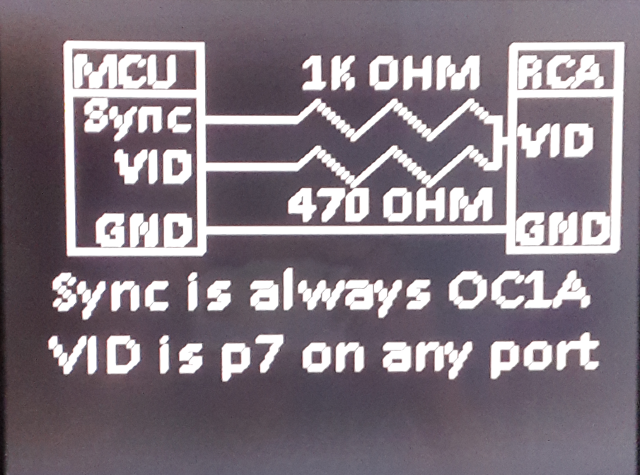
The TVOut library has a sample NTSC demo sketch. Here are two of the captured TV screens it outputs:

1 comment
Thanks a lot for this amazing tutorial