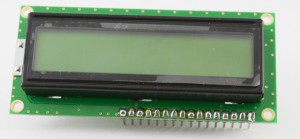
One of the problems of connecting an HD44780 LCD
 to an arduino is the number of pins taken up (usually 6). There is an older article here for hooking up an HD44780 LCD to an arduino with only 3 pins. (Note: There is an alternate link here as the original link may be down.)
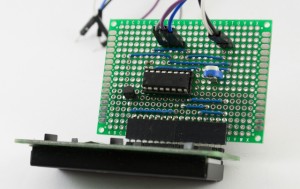
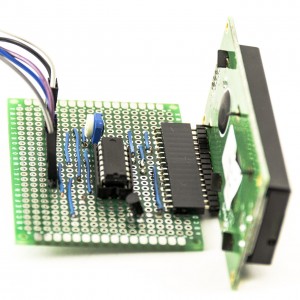
The circuit uses the 74HC595 shift register IC. I liked the idea and have built several of these circuits.
Thus I have a handy way of attaching an LCD to arduino projects without taking too many pins.
You will need a library for controlling the LCD (attached via the 74HC595 shift register) which you can get here. (Updated: here) A sample sketch is shown below. It is the same one here from the original author but I modified it via:
lcd.setLED2Pin(HIGH);
to turn the backlight on. Here is the sketch:
/*
 * 3-pin Arduino interface for HD44780 LCDs via 74HC595 Shift Register
 *     by Rowan Simms   code@rowansimms.com
 *     License: Creative Commons - Attribution.
 *     Full Documentation and Description:  http://rowansimms.com/article.php/lcd-hookup-in-seconds
 *
 * This sketch allows Arduinos to use a shift register to control an LCD, allowing
 * a reduction in pins it requires from 6 to 3 while still retaining full control
 * including backlight on/off.
 * This requires the use of the LiquidCrystal595 library
 * available at: http://code.google.com/p/arduino-lcd-3pin/
 */

#include <LiquidCrystal595.h>    // include the library
LiquidCrystal595 lcd(7,8,9);     // datapin, latchpin, clockpin

void setup() {
    lcd.init(7,8,9);
    lcd.setLED2Pin(HIGH);        // Backlight On
    lcd.begin(16,2);             // 16 characters, 2 rows
    lcd.clear();
    lcd.setCursor(0,0);
    lcd.print("Wow. 3 pins!");
    lcd.setCursor(0,1);
    lcd.print("Fabulous!");
}

void loop() {
    // not used.
}


7 comments
Skip to comment form
Hi, I would like to thank you for this interesting method that enable the use of LCD with only 3 pins. I have managed to wire up and install the program successfully. However, only the first character of each row appear on the LCD. I only see the character W (of Wow) on the first row, and the character F (of Fabulous) on the second row. The other characters are not printed. I would be pleased if you could help me to print all characters on the LCD.. Thanks
Author
If you have double checked the wiring to make sure everything is correct, please post the code/sketch you are using and we can make sure the problem is not the code.
Thank you for your kind reply Earl,I have used the code on this page when I add the following instructions to print an “o” on the first row, second column, I get “Wo” on the first row as expected. It seems that lcd.print command prints only 1 character at a time.
Author
If you are using the code on this page and you don’t see the full words on each line then apparently something is wired wrong. Note that the wiring diagram is here: http://rowansimms.com/article.php/lcd-hookup-in-seconds-shield
If I remember correctly, the actual board diagrams that are shown are not exactly correct.
You need to follow this guide in the wiring the LCD:
1. GND -> Ground
2. Vcc -> 5v
3. Vo -> Contrast (via Pot)
4. RS -> ShiftReg pin 7
5. R/W -> Ground
6. E -> ShiftReg pin 15
7. D0 -> no connection
8. D1 -> no connection
9. D2 -> no connection
10. D3 -> no connection
11. D4 -> ShiftReg pin 4
12. D5 -> ShiftReg pin 3
13. D6 -> ShiftReg pin 2
14. D7 -> ShiftReg pin 1
15. LED+ -> 5v
16. LED- -> ShiftReg pin 5 via NPN
Please check your wiring according to the above pin list.
Author
The old LiquidCrystal595 library had a problem (due to updates in the Arduino IDE). Only the 1st character would get displayed. Either update to the new library or edit LiquidCrystall595.cpp and add return 1 in the LiquidCrystal595::write function like this:
inline size_t LiquidCrystal595::write(uint8_t value) {
send(value, HIGH);
return 1;
}
the newest library can be found here: https://bitbucket.org/rowansimms/arduino-lcd-3pin
Actually 2 lines have to be modified for this library to work:
inline void LiquidCrystal595::command(uint8_t value) {
send(value, LOW);
return 1; // This is necessary for this library to work on IDE 1.6.6 and above.
// Without a return value, the LCD displays only one character per line.
}
inline size_t LiquidCrystal595::write(uint8_t value) {
send(value, HIGH);
return 1; // This is necessary for this library to work on IDE 1.6.6 and above.
// Without a return value, the LCD displays only one character per line.
}
Author
You are right! Thanks Mike!