
It is very handy to be able to control and monitor things with an Arduino. It is even more handy when you can control and monitor things remotely from wherever you are via the Internet. For arguments sake, lets say we want to both control specific devices we have attached to our Arduino and we want to know when certain events happen (that sensors attached to our Arduino can tell us about).
For the controlling part we could use a WEB application but the WEB is not good for monitoring. This is because the WEB is stateless, it is not a true two way communications system. If we really wanted to use WEB technology, we would need to keep polling (refreshing) from our page which is unnecessary overhead. Yes, we could use an XMLHttpRequest, better know as AJAX, however that too is not the right approach for event monitoring.
Event monitoring in the PC world is normally done via Simple Network Management Protocol (SNMP). That complexity is not needed for something we can implement much more simply. The Arduino Galileo runs Node.js (referred to as node) which makes it very handy and easy to implement a means of both controlling and monitoring events. This is because we can add the socket.io module to node and have true two way communications for both controlling and monitoring. The node server running on the Galileo can monitor for events we want to watch and notify any applications/devices connected to it. The node server can also handle any control requests.
For proof of concept, I coded a node server which uses the mraa module to interface with the Galileo GPIO pins. You can download it here.
Copy it to your Galielo, and extract it with:
tar -xvf galileo_node_server.tar
You will also need to install these node modules (via npm):
npm install http socket.io fs ip mraa
Then start the server via:
node galileo.js
The default port is 8888 which you can override as an optional parameter if you need to. There is an index.html file that node will send to your browser if you browse to that IP and port. Here is what the WEB (node) page looks like.
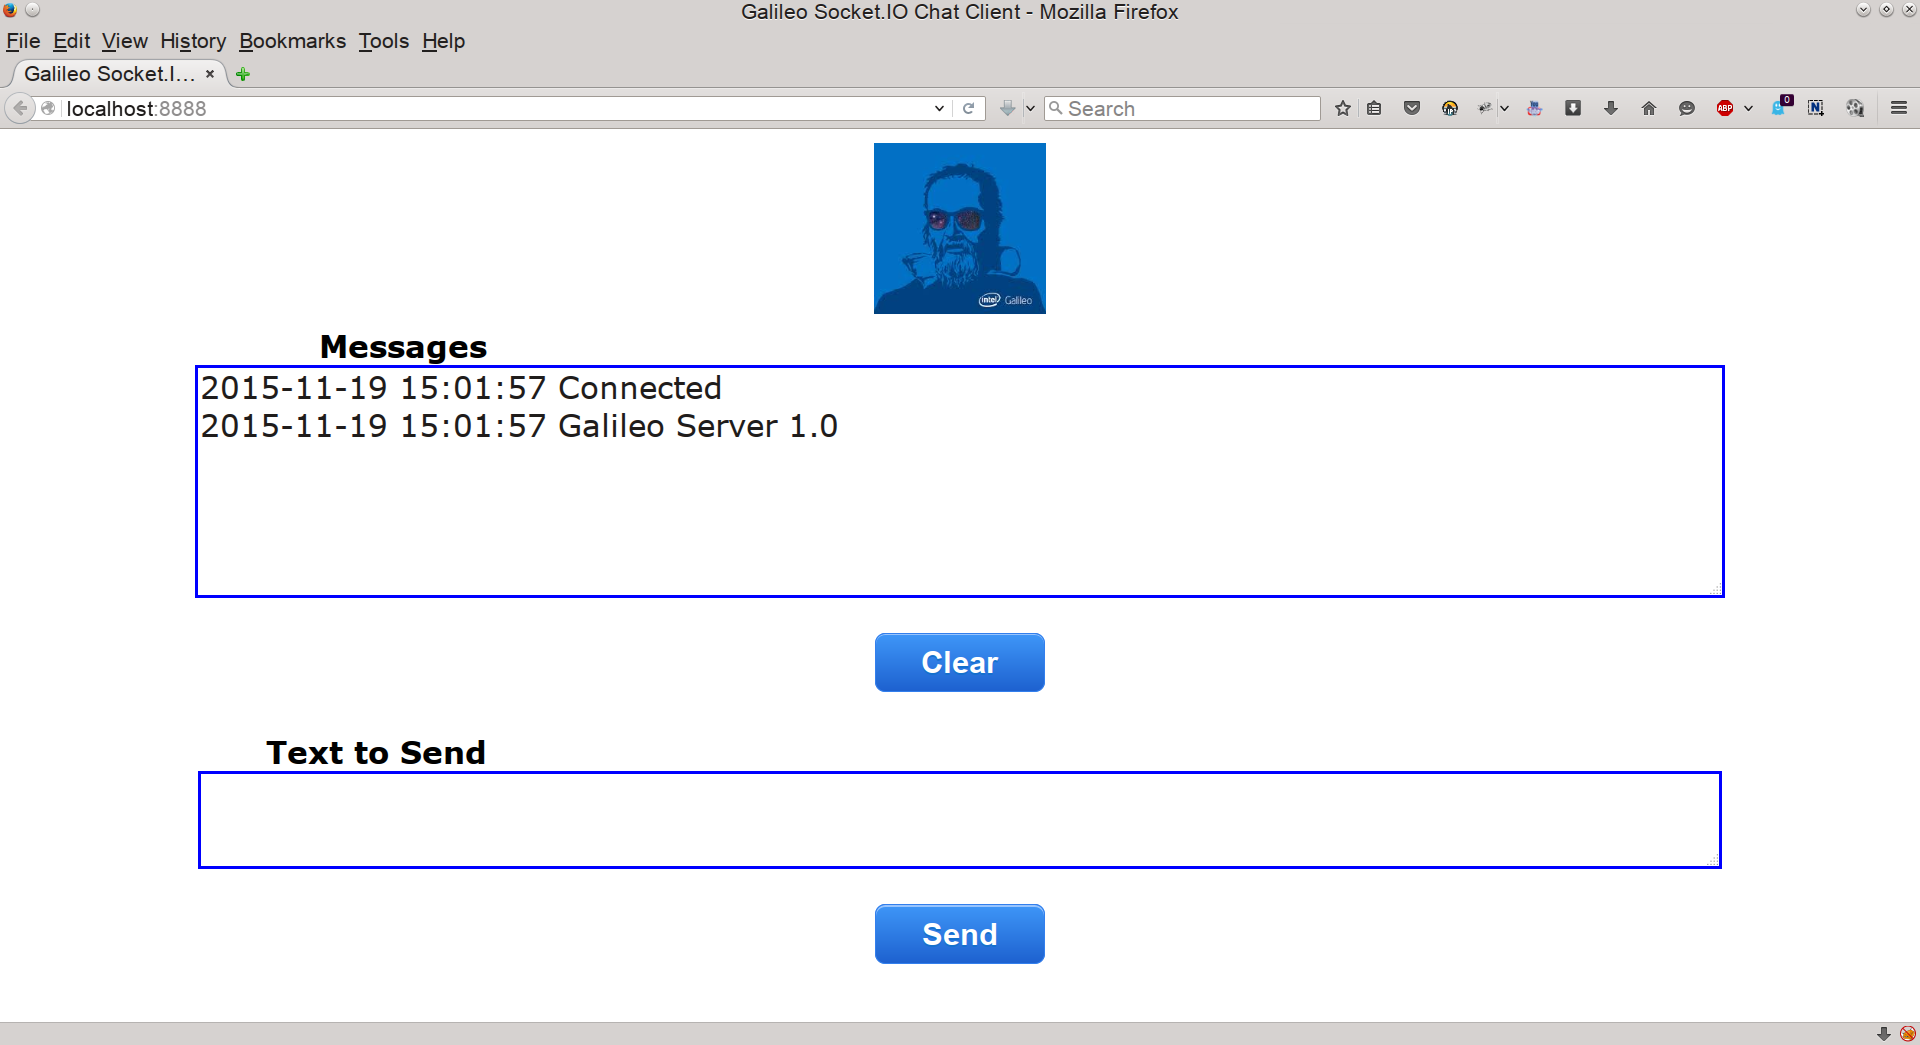 Basically it is a ‘chat’ session. Any commands entered will be sent to the node server and ‘echoed’ back to all applications/devices connected to the server. So you can actually use it as a ‘chat server’ too. Any commands that begin with ‘mraa’ are processed using the mraa module. Then syntax of the command is displayed in case of incorrect parameters.
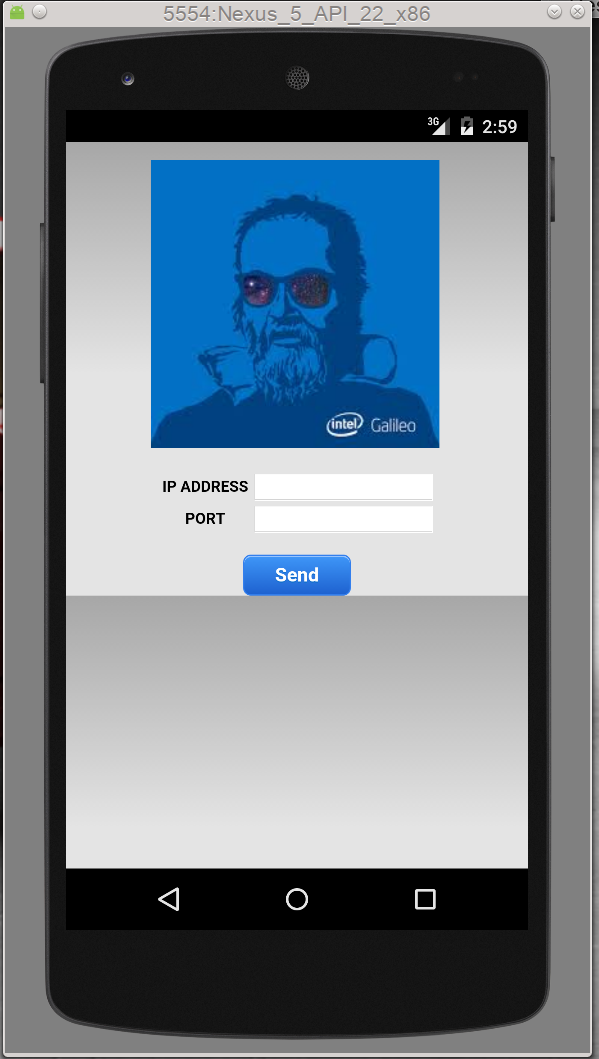
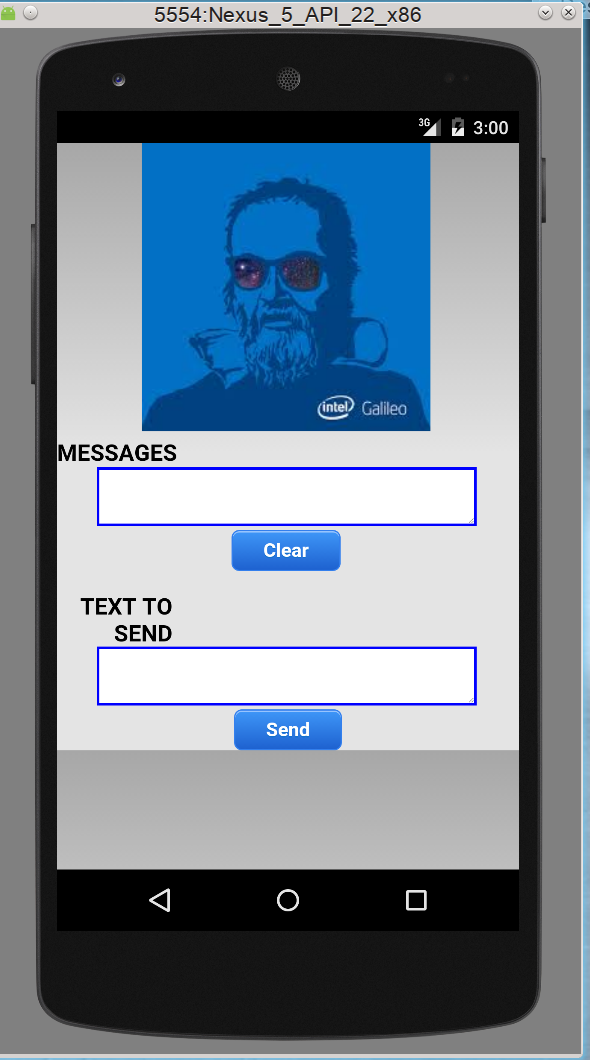
Additionally, I have coded an Apache Cordova application that you can run on your Android smart phone. You can download it here. The complete Cordova source for the apk can be downloaded here in case you want to make changes. When you install and run the apk, it will first ask you the IP address and port where the node server is running. Then it will connect (via socket.io to the node server) and allow the two way ‘chat’. Here is what the Cordova apk looks like:
 The next step I have planned is to add sensors for monitoring and add code to the node server to send the monitored data to connected applications/devices. It is interesting to note that this same node.js server code (with the mrra code commented out) will run on a Raspberry Pi. The Cordova app would not need modified (however you might want to change the image/logo from the Galileo to a Raspberry). 😎
Update: 12/28/2015 This project is now on GitHub https://github.com/earlt/galileo-node.git
Recent Comments