
Wouldn’t it be C 🙄 🙄 L to have a Linux prompt on the STM32F103C8T6. Not likely, however, Nuttx on the STM32F103C8T6 is about as close as you will get.
Nuttx is a RTOS which runs on a wide range of microcontrollers including the STM32F103C8T6.
To compile Nuttx for the STM32F103C8T6, a development environment needs set up with the right tools. My development OS of choice is a Linux distribution called Fedora (Fedora 29 is the current version at the time of this post).
To install the tools needed, I used these commands:
dnf -y install arm-none-eabi-binutils-cs arm-none-eabi-gdb arm-none-eabi-gcc-cs-c++ arm-none-eabi-newlib arm-none-eabi-gcc-cs
dnf -y install git
dnf -y install flex bison gperf automake autoconf m4 libtool ncurses ncurses-devel
The first DNF command installs the ARM development tools needed to compile Nuttx for the ARM based STM32F103C8T6. The second command installs the GIT tool used to grab the source code. The third command installs other development tools necessary for the compile process.
To begin the process, create a directory to store the downloaded source and tools:
mkdir /temp/
mkdir /temp/nx
cd /temp/nx
The Nuttx source code is downloaded with these git commands:
git clone https://bitbucket.org/nuttx/nuttx.git nuttx
git clone https://bitbucket.org/nuttx/apps.git apps
git clone https://bitbucket.org/nuttx/tools.git tools
The Nuttx configuration process needs the kconfig-frontends installed via these commands:
cd /temp/nx/tools/kconfig-frontends/
./configure
aclocal
autoconf
./configure
make
The reason for the aclocal and autoconf is to update the configuration files due to the newer versions of Fedoras’ development tools.
Next, create the Nuttx specific compile for the STM32F103C8T6 via these commands:
cd /temp/nx/nuttx/tools
./configure.sh stm32f103-minimum/nsh
That last command should have set up everything correctly for the compile. however, this next step allows verification of all settings and options.
cd  /temp/nx/nuttx
make menuconfig
A menu will appear like this:
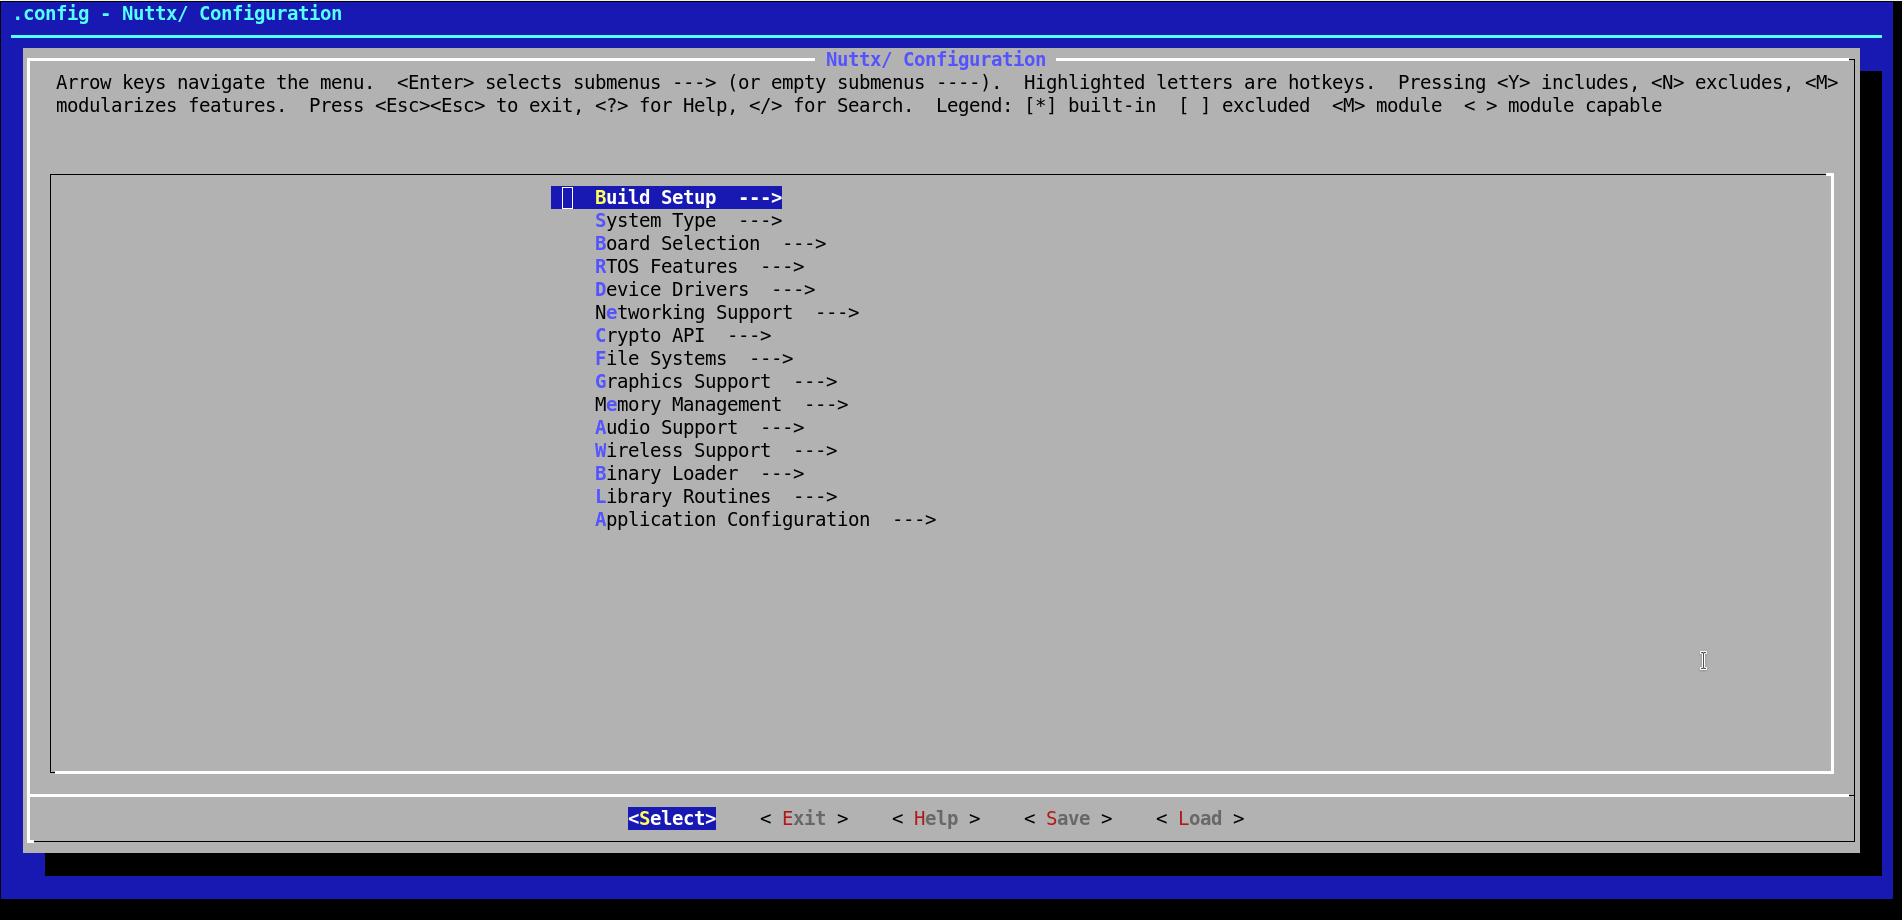
Optionally, verify the build setup and other options. Save and Exit when done.
This last step compiles the code and creates the nuttx.bin binary file to load into the STM32F103C8T6.
cd /temp/nx/nuttx/
make
Attach the STM32F103C8T6 to a USB/Serial converter to load the Nuttx binary image:
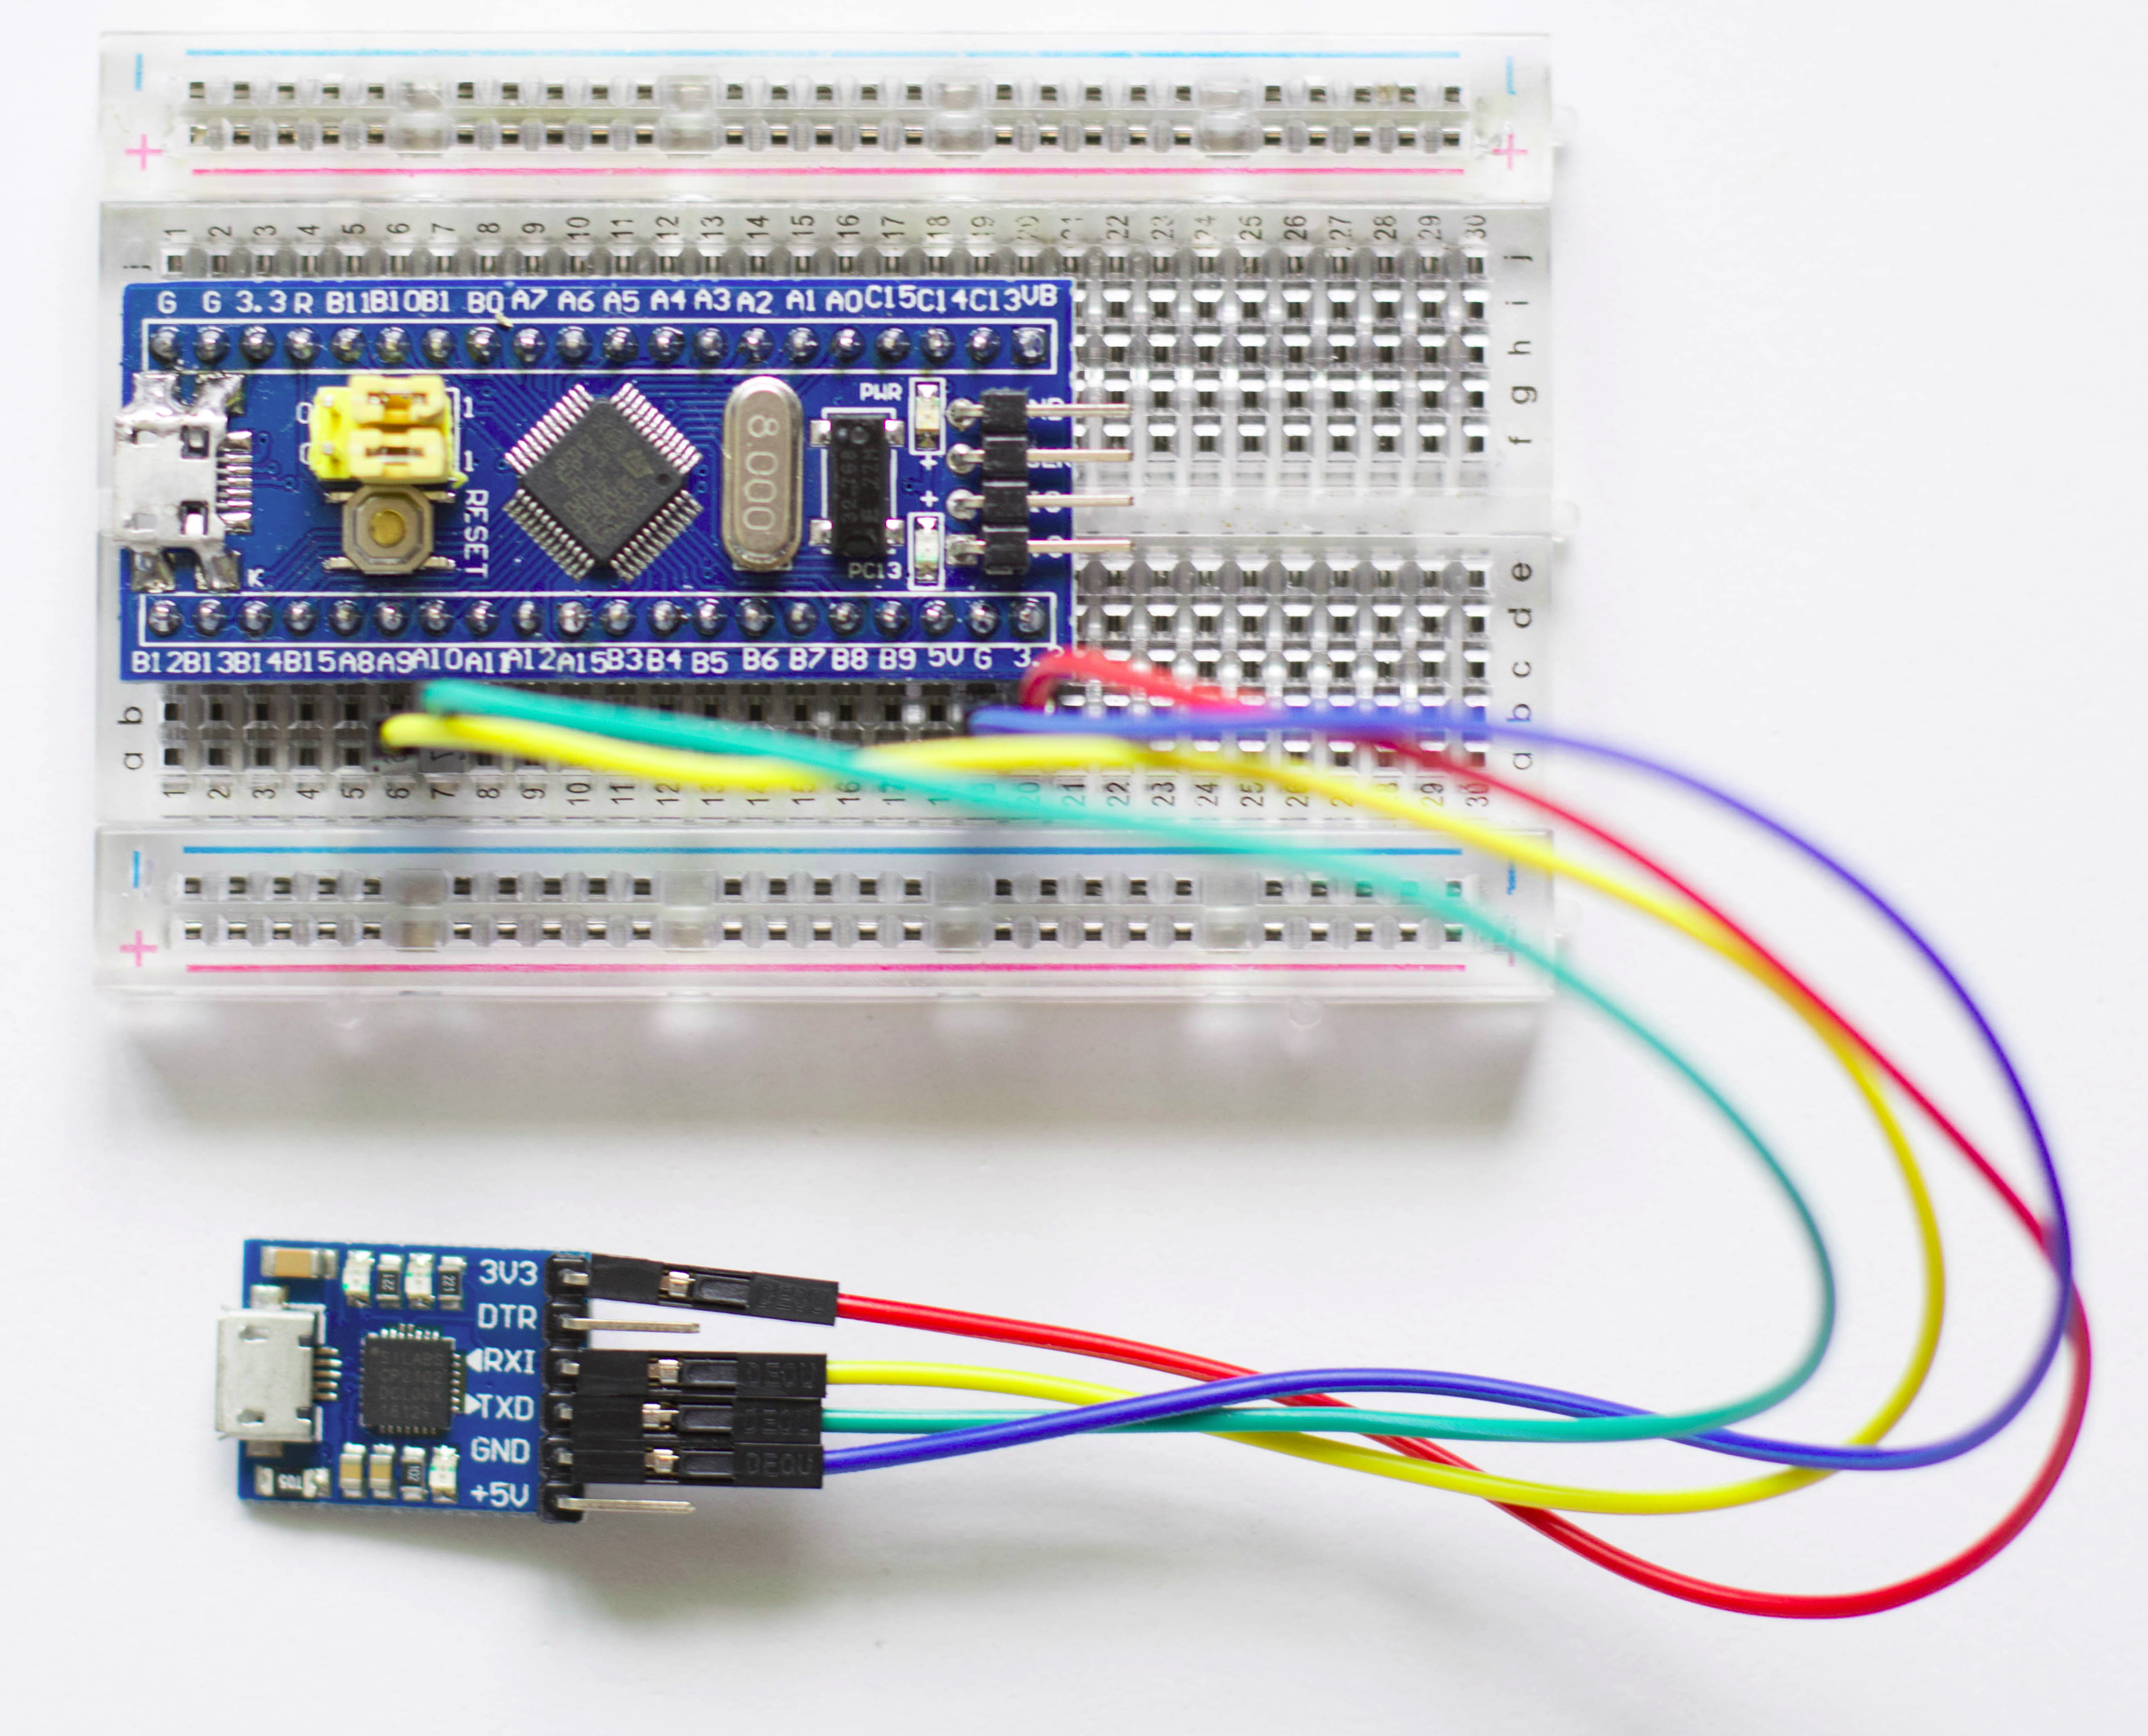
To load Nuttx on the STM32F103C8T6 va the serial to USB converter, I used the stm32flash utility downloaded from HERE. Use these commands to install it:
tar -xvf stm32flash-0.5.tar.gz
cd stm32flash/
make
make install
Use this command to load the nuttx.bin file into the STM32F103C8T6:
/stm32flash -w /temp/nx/nuttx/nuttx.bin -v -g 0x0 /dev/ttyUSB0
Once loaded with the nuttx binary, the STM32F103C8T6 is ready to send the nsh (NuttShell) prompt. Connect your PC to the USB/Serial converter port with any serial communications program (115200 baud) (like MINICOM ) and press the reset button.
Even the linux screen program can be used:
screen /dev/ttyUSB0 115200
I like using my Python serial program (documented here) via the command:
./py_ser.py 115200
For more info on Nuttx and what can be done with it, check out the Nuttx.com site HERE.
Recent Comments