
OBD-II (an abbreviation for On-Board Diagnostics, Second Generation) is a set of standards for implementing a computer based system to control emissions from vehicles ( and a lot more ! ). If you are not familiar with OBD-II you can read more about it here.
I just recently acquired an OBD-II UART board and cable
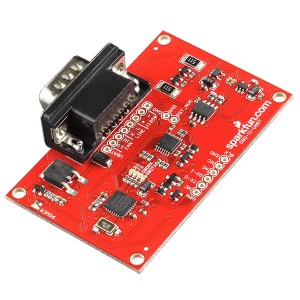
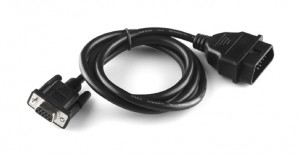
from SparkFun.com, so I can diagnose any car problems. One end of the cable connects to the OBD-II connector on your car, the other end connects to the board. The board can then connect to any serial port via a 6 pin header that needs to be soldered on.
The 6 pin header connects nicely to an FTDI board

that Sparkfun.com also sells. The tutorial about this product shows how to attach an arduino and LCD monitor to capture data from your cars’ computer.
The board did not come with any OBD-II diagnostic / analysis software but there are a number of FREE and commercial offerings to choose from.
I like to write my own software and so I came up with this Python script to inquire for and analyze the OBD information. It is too big to post here so just click on the image to download it.

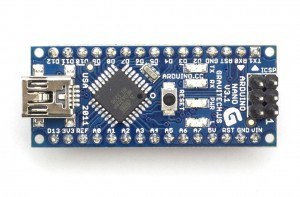
If you’d like to test the Python code but do not have the OBD-II UART, you can substitute any Arduino you might have lying around. I wrote a simple sketch to emulate the OBD-II information coming from a ‘sample’ car. Just attach the arduino to your computer via any USB cable, load the sketch and run the Python script.
I tested it with my Aduino Nano.
Here is the sketch:
# Arduino Sketch to emulate an OBD-II connection
# from earl@microcontrollerelectronics.com
#
String inputString     = "";
boolean stringComplete = false;

void setup() {
  Serial.begin(9600);
  inputString.reserve(200);
  Serial.println(">");
}

void loop() {
  if (stringComplete) {
    int    len = inputString.length();
    String ans = "4" + inputString.substring(1,2) + " ";

    if (len > 4)      ans = ans + inputString.substring(3,5) + ":";
    else if (len > 3) ans = ans + inputString.substring(2,4) + ":";
    else if (len > 2) ans = ans + inputString.substring(3,4) + ":";

    if      (inputString.substring(0,3) == "ATZ")   Serial.println("ELM327 v1.4");
    else if (inputString.substring(0,2) == "AT")    Serial.println("OK");
    else if (inputString.substring(0,5) == "01 00") Serial.println("41 00:FF FF FC FF");
    else if (inputString.substring(0,5) == "01 01") Serial.println("41 01:84 07 61 00");
    else if (inputString.substring(0,5) == "01 20") Serial.println("41 20:FF FF FC FF");
    else if (inputString.substring(0,5) == "01 40") Serial.println("41 40:FF FF FC FF");
    else if (inputString.substring(0,5) == "01 60") Serial.println("41 60:FF FF FC FF");
    else if (inputString.substring(0,5) == "01 80") Serial.println("41 80:FF FF FC FF");
    else if (inputString.substring(0,5) == "01 A0") Serial.println("41 A0:FF FF FC FF");
    else if (inputString.substring(0,5) == "01 C0") Serial.println("41 C0:FF FF FC FF");
    else if (inputString.substring(0,2) == "01")    Serial.println(ans + "00 00 00 00");
    else if (inputString.substring(0,2) == "03")    Serial.println("43 03 00 03 01 03\r\n43 13 01 04");
    else if (inputString.substring(0,5) == "09 02") Serial.println("49 02:1Z3768470804");
    else                                            Serial.println(ans + "NO DATA");
    Serial.println(">");
    inputString = "";
    stringComplete = false;
  }
}

void serialEvent() {
  while (Serial.available()) {
    char inChar = (char)Serial.read();
    if (inChar == '\n') continue;
    if (inChar == '\r') {
      stringComplete = true;
      if (inputString == "") inputString = "NULL";
      inputString.toUpperCase();
      continue;
    }
    inputString += inChar;
  }
}
Recent Comments