
To motivate and engage sales people, have a big red button to push when a sale is made. They push a button and play a video. Something fun! Add flashing lights for extra effect!
Here are two different means to accomplish this. One solution involves an Arduino UNO serially attached to a PC running the Windows OS. The other solution is just a Raspberry Pi running OSMC. OSMC basically turns a Raspberry Pi into an entertainment system.
A large screen can be attached to either the Raspberry Pi or a PC to display the video. A Raspberry PI has GPIO pins which allow it to connect to the outside world. This makes it a standalone solution for this application. A normal PC has no such connections, so that is why something like the Arduino is needed.
The Arduino UNO connects to the PC via a USB to serial cable. This is how the Arduino can be wired to a button:
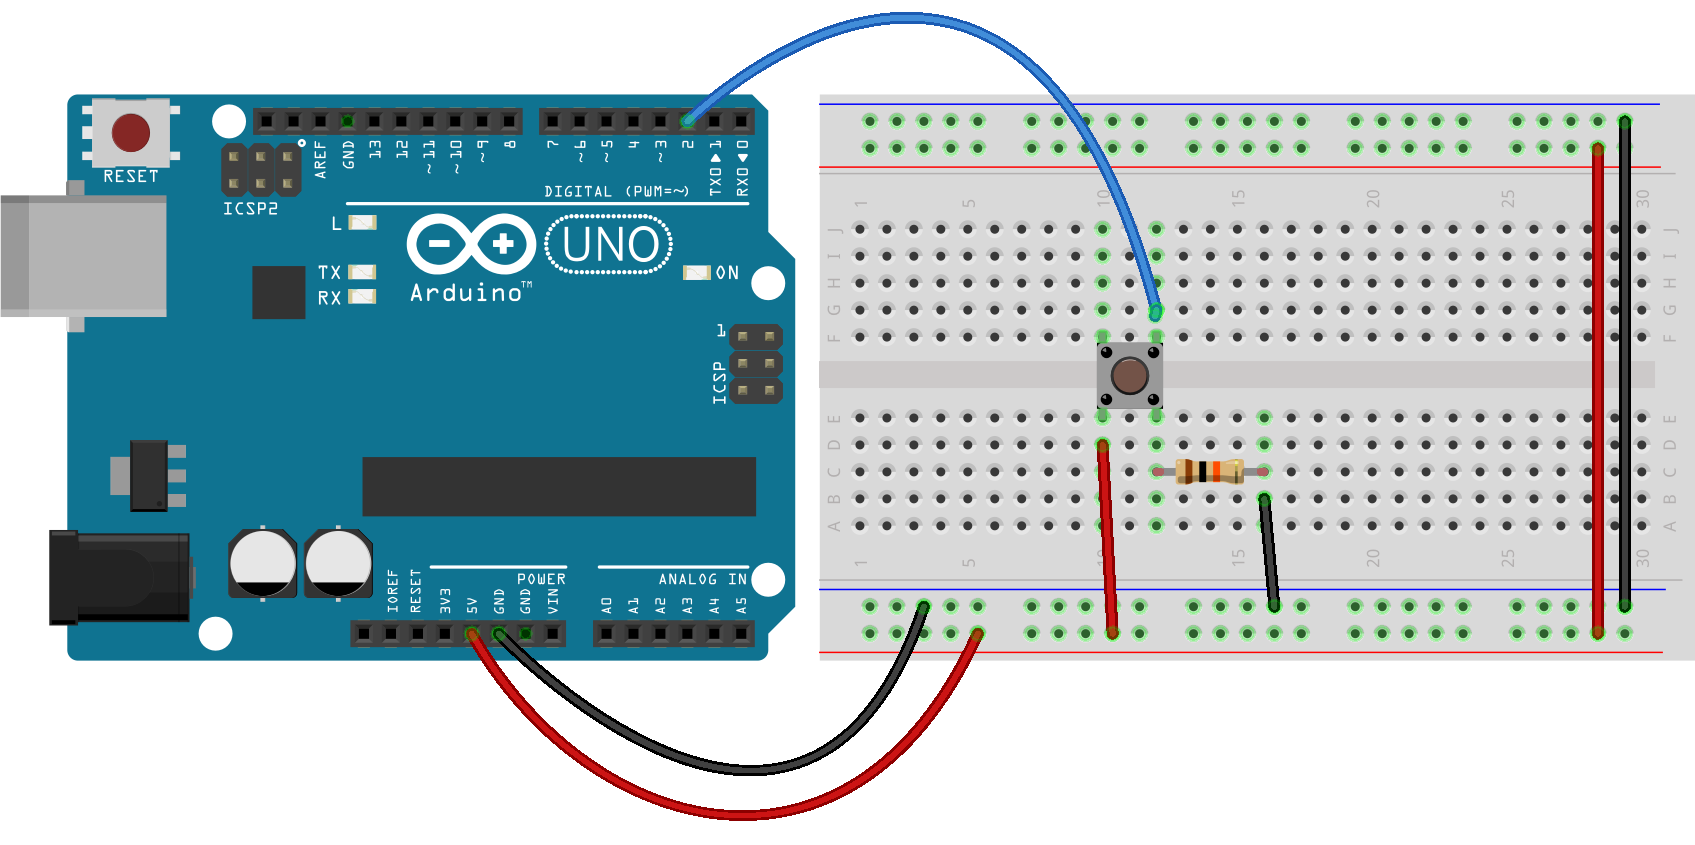 Download the fritzing source HERE. Note: The wiring is basically the same for a larger big red button which would be easier to push (and more fun!)
Notice how the standard 4 pin push button is wired:
 When the button is pushed, all four pins are connected. This is the Arduino sketch for monitoring the button push:
/*
Arduino UNO Sketch for Monitoring a button push
When a button is pushed, a 'message' is sent out
the serial port.

From: earl@microcontrollerelectronics.com
*/

const int buttonPin = 2;
const int ledPin    = 13;
int    buttonState  = 0;

void setup() {
  Serial.begin(9600);
  pinMode(ledPin, OUTPUT);
  pinMode(buttonPin, INPUT);
}

void loop() {
  buttonState = digitalRead(buttonPin);
  if (buttonState == HIGH) {
    digitalWrite(ledPin, HIGH);
    Serial.println("Button Press");
    delay(2000);
  } else {
    digitalWrite(ledPin, LOW);
  }
}
The Arduino communicates serially to a Python script. The Python script, when notified of a button push, will start the video player to play the video. Here is the script:
# Python Script to monitor the serial port where the
# Arduino is attached. If something is sent, it means
# a button was pushed and a video is launched via VLC
#
# From: earl@microcontrollerelectronics.com
#

import serial, os, time, serial.tools.list_ports

cmd = '"C:\\Program Files\\VideoLAN\\VLC\\vlc.exe" -f --play-and-exit'

for p in serial.tools.list_ports.comports():
  sp = str(p)
  if (sp.find('Arduino') != -1):
    flds = sp.split()
    port = flds[0]
    print port

ser = serial.Serial(port, 9600, timeout=0)

while 1:
  try:
    line = ser.readline()
    if (line):
      print cmd
      os.system(cmd)
  except:
    pass
  time.sleep(1)
Since that python script was designed to run on a Windows PC, VLC and Python need to be installed for it to work. The command to run VLC will need to be modified to the URL or file for the specific video to play.
The alternative solution to “Push a Button and Play a Video” is just a Raspberry Pi. After installing the OSMC distribution, use these commands to install the prerequisite software :
apt-get dist-upgrade
apt-get install python-pip
apt-get install gcc
apt-get install python-dev

pip install setuptools
pip install wheel
pip install RPi.GPIO
pip install xbmc-json
The prerequisite software is needed to allow a Python script to access the GPIO pins and interface with OSMC. Next, wire the Raspberry Pi to the button as show here:
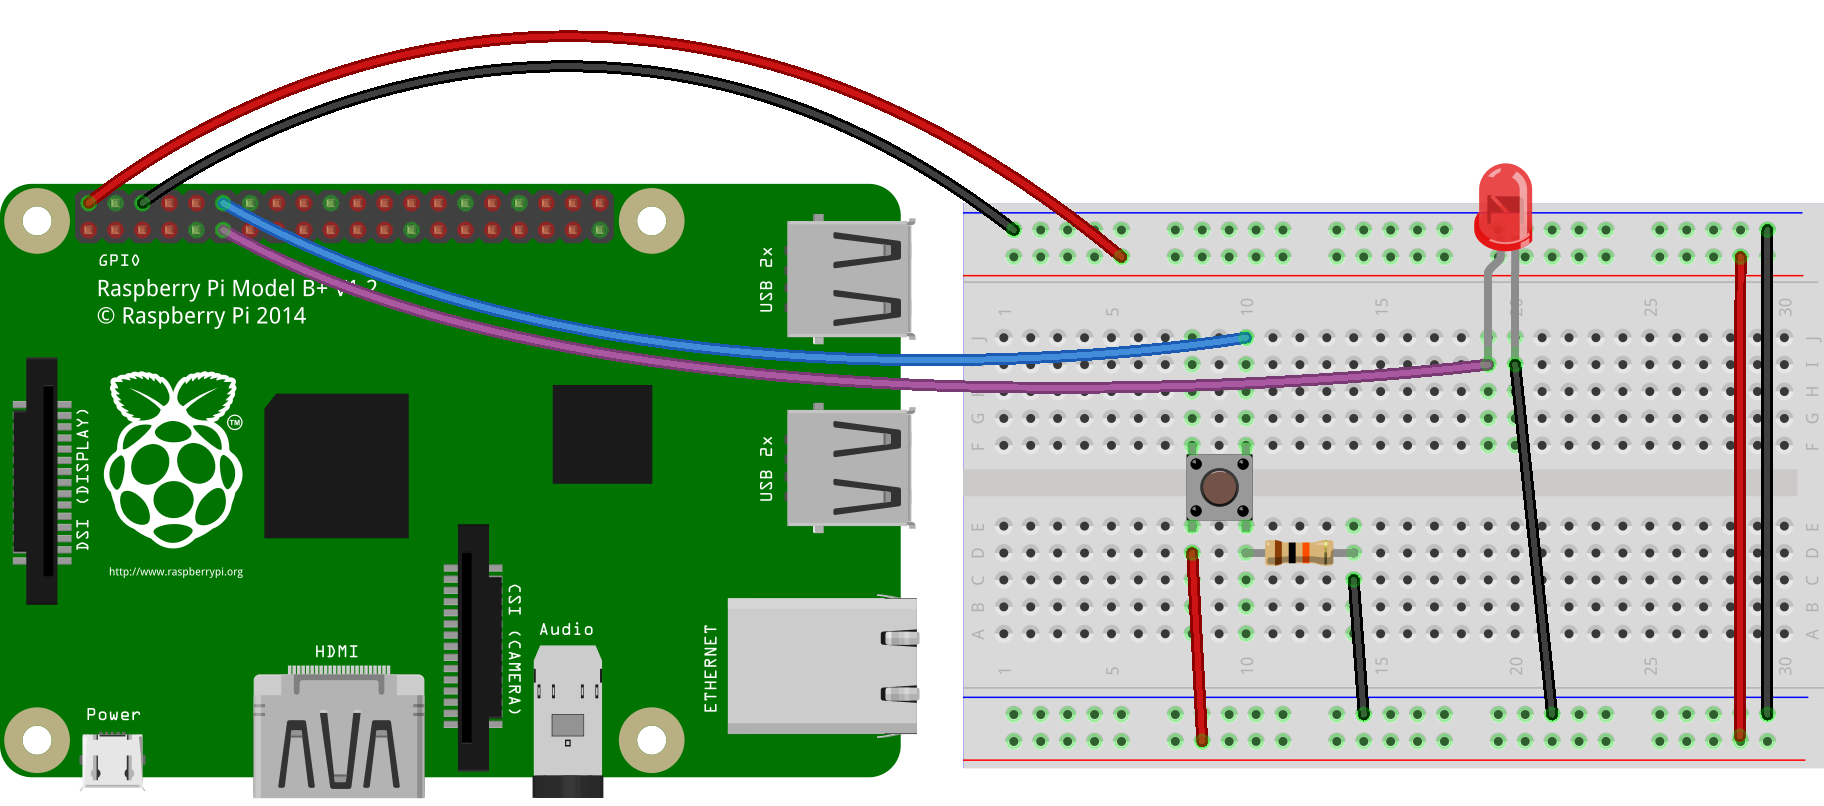
Download the fritzing source HERE. A Python script (running on the Raspberry Pi) is used to monitor for the button push and run the video:
#!/usr/bin/python
#From: earl@microcontrollerelectronics.com

import RPi.GPIO as GPIO
import time,os
from  xbmcjson import XBMC, PLAYER_VIDEO

def my_callback(channel):
  xbmc = XBMC("http://localhost/jsonrpc",'osmc','osmc')
#  print xbmc.JSONRPC.Ping()
  xbmc.Player.Stop([PLAYER_VIDEO])
  xbmc.Player.Open(item={"file":"/home/osmc/Movies/motivational.mp4"})
#  video_id = ""
#  xbmc.Player.Open(item={"file":"plugin://plugin.video.youtube/?action=play_video&videoid=" + video_id})
  xbmc.Input.Back()
  xbmc.Input.Back()
  xbmc.GUI.ActivateWindow("videos")
# xbmc.GUI.ActivateWindow({"window":"videos"})
# xbmc.GUI.ActivateWindow(window="videos")

GPIO.setmode(GPIO.BCM)
GPIO.setwarnings(False)
GPIO.setup(18,GPIO.OUT)
GPIO.setup(17, GPIO.IN, pull_up_down=GPIO.PUD_UP)
GPIO.add_event_detect(17, GPIO.FALLING, callback=my_callback, bouncetime=200)

while (1):
#  if GPIO.input(17): print('Input was HIGH')
#  else:              print('Input was LOW')

  print "LED on"
  GPIO.output(18,GPIO.HIGH)
  time.sleep(1)
  print "LED off"
  GPIO.output(18,GPIO.LOW)
  time.sleep(1)
The Raspberry Pi running OSMC uses the xbmc_json python library to control the native OSMC video player. The command to open the player and run the video will need to be modified to the URL or file for the specific video to play.
Which ever solution you choose, push a button and play a video! Fun!
1 comments
Can you use Processing in stead of python because i don’t know python or how that works