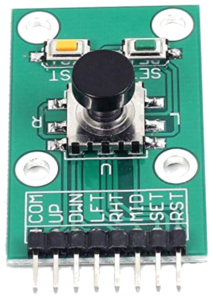
A 5 way navigation button actually has 7 different navigational settings. It has a lot of functionality in a small package. The ‘button’ on it can be moved/pushed in 4 directions ( labeled up, down, left, right) or pressed down. There are also two other switched buttons labeled ‘Set’ and ‘Reset’ for a total of 7 functions. Quite handy!
Here is what it looks like:
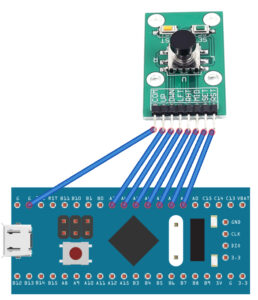
COM is wired to ground. Each of the other navigation pins are wired to a pin on the STM32F103C8T6 or Arduino . Here is what the wiring looks like when it is wired to an STM32F103C8T6.
 Here is the Arduino IDE code for the STM32F103C8T6. When the button is moved or pressed it will light the LED and display the action on the serial console. Note that the input pin is initially configured as INPUT_PULLUP which makes the pin HIGH. When the button is pushed/moved it will make the corresponding pin go to ground (LOW).
// 5 Way Navigation Button for the STM32F103C8T6
// From earl@microcontrollerelectronics.com

#define pinLED PC13
int pins[]   = { 1,2,3,4,5,6,7 };  // PA1 - PA7
int numpins  = 7;

void setup() {
 for (int c = 0; c < numpins; c++) {
   pinMode(pins[c], INPUT_PULLUP);
 }
 pinMode(pinLED,OUTPUT);
 Serial.begin(115200);
 digitalWrite(pinLED,HIGH);
}

void flashled() {
 digitalWrite(pinLED,LOW);
 delay(250);
 digitalWrite(pinLED,HIGH);
}

void loop() {
 for (int c = 0; c < numpins; c++) {
  if (digitalRead(pins[c]) == LOW) {
    while(digitalRead(pins[c]) == LOW);
    if (c == 6) Serial.println("UP");
    if (c == 5) Serial.println("DOWN");
    if (c == 4) Serial.println("LEFT");
    if (c == 3) Serial.println("RIGHT");
    if (c == 2) Serial.println("MID");
    if (c == 1) Serial.println("SET");
    if (c == 0) Serial.println("RESET");
    flashled();
  }
 }
}
Here is the code for an Arduino Uno using Digital Pins (2,3,4,5,6,7,8):
// 5 Way Navigation Code for Arduino Uno
// from earl@microcontrollerelectronics.com

int pins[]   = { PD2,PD3,PD4,PD5,PD6,PD7,8 };
int numpins  = 7;
void setup() {
 for (int c = 0; c < numpins; c++) {
   pinMode(pins[c], INPUT_PULLUP);
 }
 pinMode(LED_BUILTIN,OUTPUT);
 Serial.begin(115200);
 digitalWrite(LED_BUILTIN,LOW);
}
void flashled() {
 digitalWrite(LED_BUILTIN,HIGH);
 delay(250);
 digitalWrite(LED_BUILTIN,LOW);
}
void loop() {
 for (int c = 0; c < numpins; c++) {
  if (digitalRead(pins[c]) == LOW) {
    while(digitalRead(pins[c]) == LOW);
    if (c == 0) Serial.println("UP");
    if (c == 1) Serial.println("DOWN");
    if (c == 2) Serial.println("LEFT");
    if (c == 3) Serial.println("RIGHT");
    if (c == 4) Serial.println("MID");
    if (c == 5) Serial.println("SET");
    if (c == 6) Serial.println("RESET");
    flashled();
  }
 }
}
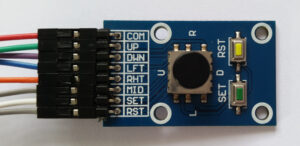
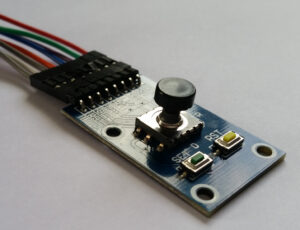
Here is a top and side view of the button so you can see it looks somewhat like a joystick.


Recent Comments