
If you would like to go beyond the basic features in the ‘default’ ESP8266 firmware, it is possible (and relatively easy) to create your own ESP8266 custom firmware.
 With ESP8266 custom firmware, your possibilities for interaction with connected devices are almost endless.
The reason why is that you can now connect pins on the ESP8266 to other devices and control those devices ‘programatically’. This is possible due to the custom firmware using the LUA programming language (specifically embedded LUA or eLUA). The team at nodemcu.com have developed an ESP8266 based IOT module called NodeMcu and open source firmware for it. You can see examples of what can be done with LUA on their main WEB page. Their firmware (available on Github HERE) can be FLASHed on any ESP8266 Wifi SOC.
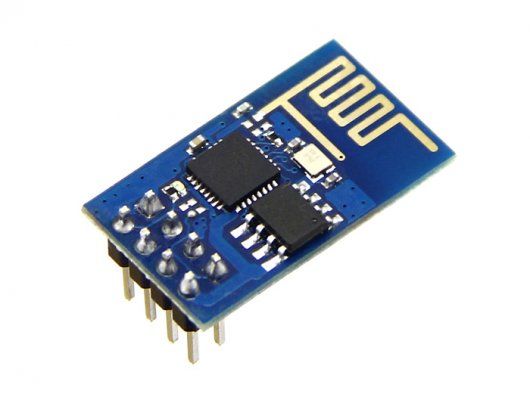
I am using an ESP8266-01 module (as seen in the above picture). It only has two GPIO pins available, however, that is sufficient for what I need. Other ESP8266 models (like the NodeMcu) have a lot more pins broken out for use.
The documentation for the NodeMCU firmware is HERE. There is a ‘cloud’ (i.e. WEB) based service to build a custom firmware image HERE. However, I prefer to experiment on my own, so I installed the development tools locally on my Fedora Linux system. Here is how I did it:
First, make sure all the Fedora Linux prerequisites are installed:
dnf install make unrar autoconf automake libtool gcc gperf flex bison texinfo gawk ncurses-devel python-devel python sed git unzip bash help2man wget bzip2 texinfo help2man ncurses ncurses-devel
Next, make sure that the flash tool (esptool.py) is installed (or if installed, is up to date):
pip install --upgrade esptool
Next install the development toolchain for the ESP8266:
mkdir /opt/nodemcu
mkdir /opt/nodemcu/devel
cd /opt/nodemcu/devel

git clone --recursive https://github.com/pfalcon/esp-open-sdk.git

cd esp-open-sdk/
make STANDALONE=y
That will take a while and let you know the PATH to export so the next step can invoke the toolchain correctly. Next, install the NodeMcu firmware:
export PATH=/opt/nodemcu/devel/esp-open-sdk/xtensa-lx106-elf/bin:$PATH

cd /opt/nodemcu/devel/
git clone --recursive https://github.com/nodemcu/nodemcu-firmware.git
Next, read the build documentation to see how you want to customize the options and what ESP8266 function modules you want to include. After you customize:
cd nodemcu-firmware-master/
make
This will take a while and then produce two bin images in the bin directory:
0x00000.bin and 0x10000.bin
Now you are ready to flash those files into your ESP8266 module. Make sure the ESP8266 is in flash mode via GPIO00 pulled low (normal GPIO00 is high or floating). Here is how it should be wired:
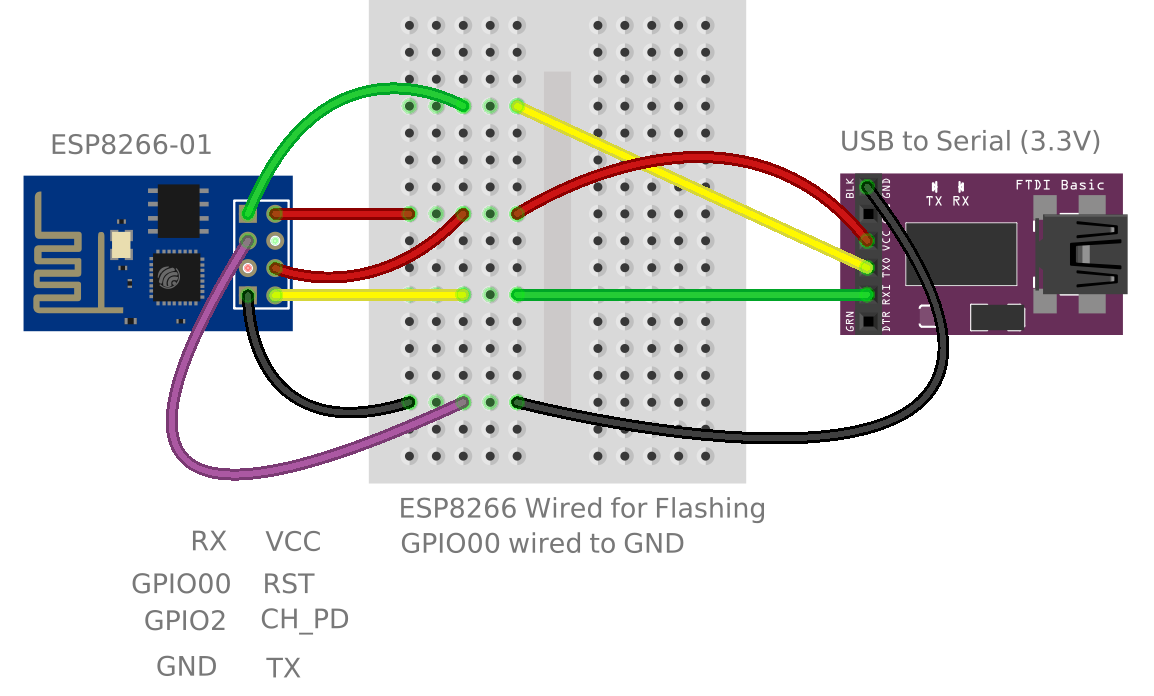 (The Fritzing diagram source is HERE.) Then flash the ESP8266 with these commands:
cd bin
esptool.py --port /dev/ttyUSB0 erase_flash
esptool.py --port /dev/ttyUSB0 write_flash -fm qio 0x00000 0x00000.bin
esptool.py --port /dev/ttyUSB0 write_flash -fm qio 0x10000 0x10000.bin
An alternative is to combine (aggregate) the binary images into one file. To make the aggregated file, here is a python script to automate it:
import sys, os
bin0 = os.path.getsize("0x00000.bin")
bsize = 65536 - bin0
os.system("dd if=/dev/zero of=blanks bs=1 count=" + str(bsize))
os.system("cat 0x00000.bin blanks 0x10000.bin >aggregate.bin")
os.system("rm blanks")
To flash that aggregated file use these commands:
esptool.py --port /dev/ttyUSB0 erase_flash
esptool.py --port /dev/ttyUSB0 write_flash -fm qio 0x00000 aggregate.bin
The ESP8266 can then be accessed by a serial connection. I recommend getting the ESPlorer developer IDE found HERE. It makes coding and uploading your LUA code very easy. Here is a screenshot of ESPlorer:
 There are sample LUA scripts in the nodemcu-firmware-master directory for you to experiment with or exercise your LUA skills and develop your own.
For example, here are the commands to setup the ESP8266 as an Access Point and set its SSID and Password:
wifi.setmode(wifi.SOFTAP)
wifi.ap.config({ssid="ESP8266",pwd="ESP_8266"})
HERE is an example LUA WEB server script to toggle PIN 4 (GPIO2) from a WEB page. It is called init.lua so that when the ESP8266 is powered on it will run that script automatically. Of course just toggling a PIN is not so useful 🙄 so you will want to attach it to something like a relay to turn something on or off.
For the latest information on this whole process, consult the NodeMcu documentation HERE.
Recent Comments