
Are you ready for another off topic article on WebRTC? This one is titled WebRTC Phone Calls via Asterisk. I have written about Asterisk before (HERE) and that article did have something to do with microcontrollers 😎 Asterisk is an open source full featured phone system (PBX). In my last post about WebRTC, I showed how to do video/audio sharing via WebRTC. This article shows how to turn your Web browser into a (tele)phone (using the PC audio devices and WebRTC Javascript code). With the code provided you can make and answer calls through your Asterisk system via the Web.
Of course you need an Asterisk system up and running for testing this. There are many helpful tutorials on the internet to help with that. The Asterisk wiki also has very good documentation on installing and customizing Asterisk.
The article to customize Asterisk for WebRTC is HERE. Basically, there are three configuration files that need changed to make WebRTC Phone Calls via Asterisk. Usually these files (httpd.conf, extensions.conf, sip.conf) are found in the /etc/asterisk directory after installation .
For httpd.conf, you will need to select a port for both TLS and HTTP. You will also need a valid SSL certificate. I am using one from Letsencrypt.org. In the example below I am using port 7070 for HTTP and 7079 for TLS.
[general]
servername=Asterisk
enabled=yes
bindaddr=(your asterisk server IP address)
bindport=7070
tlsenable=yes
tlsbindaddr=(your asterisk server IP address):7079
tlscertfile=/etc/letsencrypt/live/yourdomain.com/cert.pem
tlsprivatekey=/etc/letsencrypt/live/yourdomain.com/privkey.pem
For sip.conf , you need to specify the parameters for the phone (I am using extension 5099):
[5099]
type=friend
defaultuser=5099
host=dynamic
secret=webrtcs5099*
encryption=yes         ; Tell Asterisk to use encryption for this peer
avpf=yes               ; Tell Asterisk to use AVPF for this peer
icesupport=yes         ; Tell Asterisk to use ICE for this peer
context=webrtc-sip     ; Default context for incoming calls
directmedia=no         ; Asterisk will relay media for this peer
transport=wss          ; Asterisk will allow this peer to register on UDP or WebSockets
force_avp=yes          ; Force Asterisk to use avp. Introduced in Asterisk 11.11
rtcp_mux=yes           ; Tell Asterisk to do RTCP mux
dtlsenable=yes         ; Tell Asterisk to enable DTLS for this peer
dtlsverify=fingerprint ; Tell Asterisk to verify DTLS fingerprint
dtlssetup=actpass      ; Tell Asterisk to use actpass SDP parameter when setting up DTLS
dtlscertfile=/etc/asterisk/keys/pbx.pem
Note that WebRTC will be using the websocket protocol for communications to the Asterisk server.
In extensions.conf is where you specify the context and dialing plan so that the WebRTC enabled phone can make and receive calls:
[webrtc-sip]
include => local-extensions
exten => 5099,1,Dial(SIP/5099,30)
Note: The dialing plan is where security is very important because it specifies who the ‘phone/user’ is allowed to dial and also what is allowed to call it.
Once Asterisk has been configured, the WebRTC code can be accessed to try a call. To implement the SIP and WebRTC protocols I have chosen to use the JSSIP Javascript library code (HERE).
Download the JSSIP library and place it (jssip.min.js) in the same Web directory as the two other files (index.html and sip.js) show below.
Here is the index.html page to enable the phone:
<!DOCTYPE html>
<html>
<head>
<title>WebRTC to VOIP Asterisk Calling</title>
<style>
.btn {
 box-shadow: 0px 1px 0px 0px #f0f7fa;
 background:linear-gradient(to bottom, #33bdef 5%, #019ad2 100%);
 background-color:#33bdef;
 border-radius:6px;
 border:1px solid #057fd0;
 display:inline-block;
 cursor:pointer;
 color:#ffffff;
 font-family:Arial;
 font-size:15px;
 font-weight:bold;
 padding:6px 24px;
 text-decoration:none;
 text-shadow:0px -1px 0px #5b6178;
}

.btn:hover {
 background:linear-gradient(to bottom, #019ad2 5%, #33bdef 100%);
 background-color:#019ad2;
}

.btn:active {
 position:relative;
 top:1px;
}
</style>
<meta charset="utf-8" />
</head>
<body>
<br>
<center>
<H1>Answer or Call via WebRTC from/to VOIP Asterisk<br>with your PC/Laptop Microphone and Speakers/Headset</H1>
<br>
<br>
<form>
<table>
<tr><td>Phone # </td><td><input id=phone name="Phone #"  type=text     value='' /></td></tr>
<tr><td>Password</td><td><input id=pass  name="Password" type=password value='' /></td></tr>
<tr><td>Extension to call</td><td><input id=extension name=extension type=text value='' /></td></tr>
</table>
</form>
<br>
<div id=buttons>
 <button class=btn id=regbtn  onclick="register();">Register</button>
 <button class=btn id=callbtn onclick="call();">Call</button>
</div>
</center>
<script src='jssip.min.js'></script>
<script src='sip.js'></script>
</body>
</html>
Here is the main Javascript code (sip.js):
//JsSIP.debug.enable('JsSIP:*');
//JsSIP.debug.disable('JsSIP:*');

const domain = 'yourdomain.com';
const port   = '7079'

var callbtn  = document.getElementById("callbtn");
var exten    = document.getElementById("extension");
var regbtn   = document.getElementById("regbtn");
var phone    = document.getElementById("phone");
var pass     = document.getElementById("pass");
var socket   = new JsSIP.WebSocketInterface('wss://' + domain + ':' + port + '/ws');
var ua       = "";
var sipAudio = new Audio();

function register() {
  var configuration = {
    sockets  : [ socket ],
    uri      : 'sip:' + phone.value + '@' + domain,
    password : pass.value,
    register : true,
  };

  ua = new JsSIP.UA(configuration);

  ua.on('connected',    function(e) {
    regbtn.textContent = 'Connected';
    console.log('agent is connected'); });
  ua.on('disconnected', function(e) {
    regbtn.textContent = 'DisConnected';
    console.log('agent is disconnected'); });
  ua.on('registered',   function(e) {
    regbtn.textContent = 'Registered';
    console.log('agent is registered'); });
  ua.on('unregistered', function(e) {
    regbtn.textContent = 'UnRegistered';
    console.log('agent is unregistered'); });
  ua.on('sipEvent', function(e) {
    console.log('sipEvent'); });
  ua.on('newRTCSession', function(e) {
    console.log("newRTCSession");
    console.log(e);
    var session = e.session;
    if (session.direction === "incoming") {
      session.on('peerconnection', function(e) {
        console.log("peerconnection");
        e.peerconnection.addEventListener('addstream', function (e) {
          console.log("Stream added");
          sipAudio.srcObject = e.stream;
          sipAudio.play();
        });
      });
      callbtn.textContent = 'Incoming Call';
      var callOptions = {
        mediaConstraints: {
          audio: true, // only audio calls
          video: false
        }
      };
      session.answer(callOptions);
    }
    else {
      session.connection.addEventListener('addstream', function (e) {
        console.log("Stream added");
        sipAudio.srcObject = e.stream;
        sipAudio.play();
      });
    }
    session.on('confirmed',function(e){ console.log("session confirmed"); });
    session.on('failed',   function(e){ console.log("session failed");    });
    session.on('ended',    function(e){
      console.log("session ended");
      callbtn.textContent = 'Call';
    });
    session.on('accepted', function(e){ console.log("session accepted");  });
  });
  ua.on('registrationFailed', function(e) {
    regbtn.textContent = 'Register Failed';
    console.log('agent register failed : ' + e.request +  e.response);
  });
  ua.on('sipEvent', function(e) {
    console.log('Sip Event');
    console.log(e);
  });
  ua.on('newMessage', function(e) {
    console.log('New Message');
    console.log(e);
  });
  ua.start();

}

function call() {
  var eventHandlers = {
    'progress': function(e) {
      callbtn.textContent = 'Call in Progress';
      console.log('call is in progress');
    },
    'failed': function(e) {
      callbtn.textContent = 'Call Failed';
      console.log('call failed');
    },
    'ended': function(e) {
      callbtn.textContent = 'Call';
      console.log('call ended');
    },
    'confirmed': function(e) {
      callbtn.textContent = 'Call Confirmed';
      console.log('call confirmed');
    },
  };

  var options = {
    'eventHandlers'    : eventHandlers,
    'mediaConstraints' : { 'audio': true, 'video': false }
  };

  ua.call('sip:' + exten.value + '@' + domain , options);

  callbtn.textContent = 'Dailing';
}
Make sure to change the domain name and port to match what is configured in Asterisk. Then navigate to the index.html page and you should see this page:
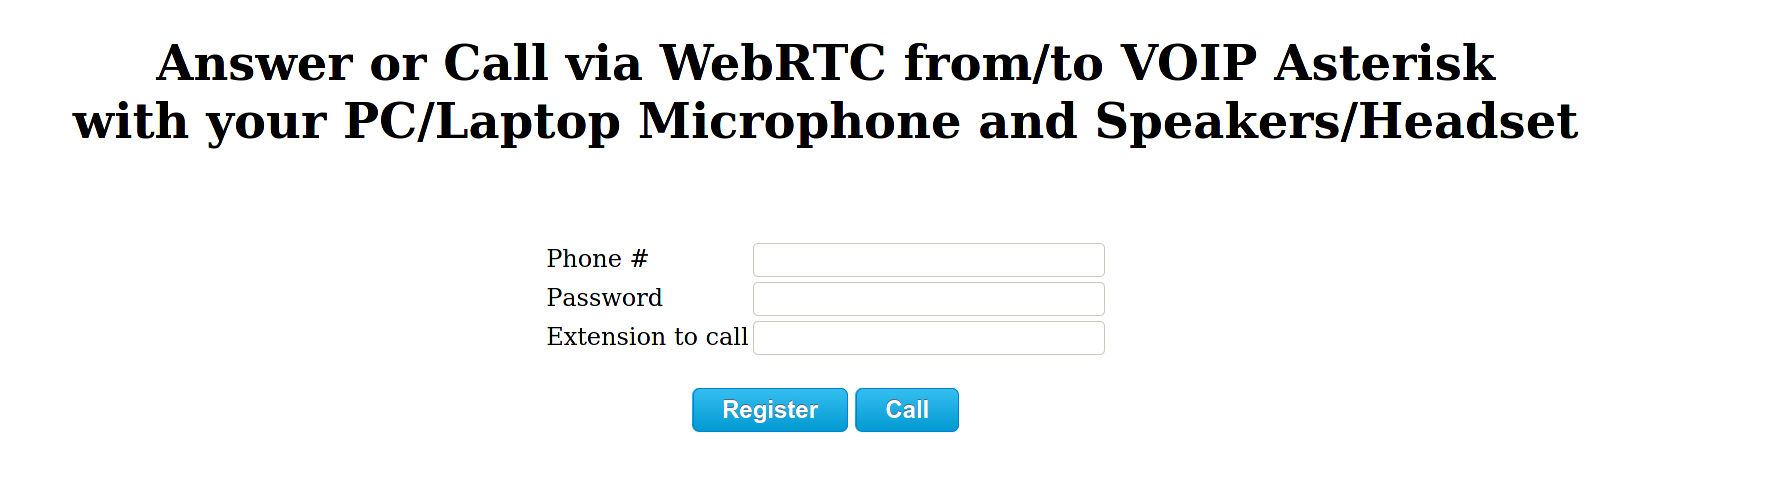
Then put in the phone number and password for the WebRTC phone and click Register. If all goes well, the Register button will change to ‘Registered’. Your WebRTC phone is now ready to answer or make calls.
Put in an extension to call and click the Call button. The Call button will change to match the state of the call. Any incoming calls will automatically be answered and the Call button will be updated to the state of the call. Note: WebRTC (the browser) will ask permission to use the microphone when the fist call is made or answered.
Note that diagnostic messages are logged to the web console. Un-commenting the JsSIP debug.enable in sip.js will also show a lot of interesting debug information for those curious as to what is happening behind the scenes.
Recent Comments